
In This Article
✨Was this helpful? Spread the word! 🚀
Alright, let’s talk about staying cool on the road. If you’ve spent any time in an RV during summer, you know that feeling when the afternoon sun turns your mobile home into a rolling sauna. I’ve been there, sweating through my shirt while desperately fanning myself with a magazine. That’s when I realized having the right air conditioner isn’t just about comfort—it’s about making your RV actually livable.
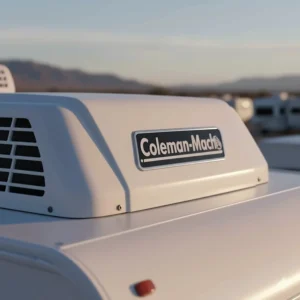
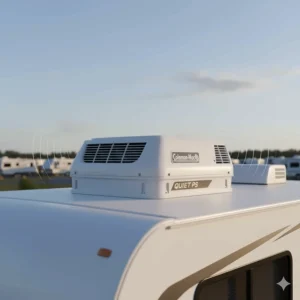
When it comes to RV climate control, one name consistently rises to the top: Coleman. The coleman mach rv air conditioner has been the gold standard for decades, and there’s a good reason why you’ll find these units factory-installed in countless motorhomes, travel trailers, and fifth wheels across America. Since 1967, they’ve produced over 6 million units, which tells you something about their reliability and industry dominance.
But here’s the thing—not all Coleman air conditioners are created equal. Some are built for maximum cooling power, others prioritize a low profile for better aerodynamics, and a few models pack enough features to rival your home HVAC system. Whether you’re planning a cross-country adventure or just want to upgrade your aging RV AC, understanding your options makes all the difference.
In this comprehensive guide, I’ll walk you through everything you need to know about selecting, installing, and maintaining a coleman rv air conditioner. We’ll explore the top models available right now on Amazon, break down the technical specifications that actually matter, and help you figure out which unit matches your specific needs and budget. Let’s dive in and get you sorted with the perfect cooling solution.
Why Coleman Mach Dominates the RV Air Conditioning Market
The Legacy of Innovation ❄️
Coleman-Mach isn’t just another name in the RV accessories market—they practically invented it. Starting back in 1967, when recreational vehicles were still finding their footing as a legitimate lifestyle choice, Coleman recognized that traditional air conditioning wouldn’t cut it for vehicles constantly on the move. They engineered units specifically designed to handle the unique challenges of mobile living: constant vibration, varying power sources, exposure to extreme weather, and the need for lightweight yet durable construction.
Over five decades, they’ve refined their designs based on real-world feedback from millions of RVers. That’s not marketing fluff—it’s genuine experience translated into better products. The company operates out of Wichita, Kansas, where every unit is manufactured and rigorously tested before shipping to customers worldwide. This American-made quality has earned Coleman-Mach partnerships with virtually every major RV manufacturer, which is why your brand-new camper probably came with one of their units already installed.
What Sets Coleman Apart From Competitors ⚡
Several factors separate Coleman from the pack. First, their engineering focuses on the actual conditions RVs face, not just theoretical cooling capacity. Their units feature all-copper tubing and gas-flux brazed joints, which might sound technical, but basically means they’re built to last through years of road vibration without developing leaks. Compare that to competitors using aluminum or mixed-metal construction, and you start to see why Coleman units often outlive the RVs they’re installed in.
Second, Coleman offers the widest range of configurations in the industry. Need maximum cooling for a large Class A motorhome? They’ve got you covered. Want an ultra-low profile unit that won’t kill your fuel economy? They make that too. Require a heat pump for four-season camping? Multiple options available. This variety means you’re not forcing a one-size-fits-all solution onto your unique situation.
Third—and this matters more than most people realize—parts availability is exceptional. When you’re dealing with a 10-year-old rv air conditioner coleman mach unit that needs a new condenser fan or thermostat, you can actually find replacement parts. Try doing that with some obscure imported brand, and you’ll quickly appreciate Coleman’s extensive dealer network and long-term commitment to supporting their products.
According to the U.S. Department of Energy, RV air conditioners face significantly more stress than residential units due to constant movement and exposure, making durability a critical factor in long-term value.
Top 7 Coleman Mach RV Air Conditioner Models Available on Amazon
Now let’s get into the actual products you can purchase today. I’ve researched current availability on Amazon, verified specifications, and analyzed customer feedback to bring you these seven standout options. Each serves a different purpose, so pay attention to which one aligns with your specific needs.
1. Coleman-Mach 48204C966 Mach 15 – The Powerhouse Champion 🏆
If you want the absolute most powerful cooling available in an RV air conditioner, look no further. The Coleman-Mach 48204C966 Mach 15 delivers a staggering 15,000 BTUs of cooling capacity, making it the world’s most powerful RV rooftop unit. I’m not exaggerating—this is the beast that handles the biggest motorhomes and fifth wheels with ease.
Key Specifications:
- ✅ 15,000 BTU cooling capacity
- ✅ 320 CFM airflow with 1/3 HP fan motor (largest in industry)
- ✅ Fits standard 14″x14″ roof opening
- ✅ R-410A eco-friendly refrigerant
- ✅ All-copper tubing construction
- ✅ Arctic White color
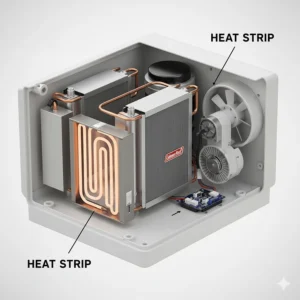
- ✅ Compatible with optional 5,600 BTU heater assembly
The Mach 15 utilizes the largest fan motor available in any RV air conditioner—a 1/3 HP powerhouse that pushes cool air at an incredible rate. This makes it ideal for ducted systems where air needs to travel through multiple vents throughout your rig. The airflow is so strong that you’ll actually feel the difference compared to lesser units.
Installation requires a ceiling assembly (sold separately), but this is standard for all Coleman rooftop units. The streamlined shroud design helps reduce wind resistance while protecting the condenser coils from road debris. Coleman backs this unit with a solid warranty, though specific terms vary by retailer.
Best for: Class A motorhomes, large fifth wheels, hot climate camping, full-time RVers who demand maximum cooling power.
Current price range on Amazon: $1,100-$1,500 depending on color and bundled options.
2. Coleman-Mach 48203C969 Mach 3 Plus – The Best Value Pick 💰
America’s best-selling RV air conditioner for good reason. The Coleman-Mach 48203C969 Mach 3 Plus strikes that sweet spot between performance, reliability, and affordability that makes it the go-to choice for most RV owners. With over 50 years of proven performance, this unit has earned its reputation as the workhorse of the coleman mach air conditioner lineup.
Key Specifications:
- ✅ 13,500 BTU cooling capacity
- ✅ 320 CFM airflow
- ✅ 13.1 amp compressor draw
- ✅ Standard 14″x14″ installation
- ✅ All-copper tubing with gas-flux brazed joints
- ✅ Available in Arctic White or Black
- ✅ Weighs approximately 79.5 pounds
What makes the Mach 3 Plus so popular? It’s the Goldilocks unit—not too powerful for small rigs, not too weak for larger ones. The 13,500 BTU capacity handles most travel trailers, toy haulers, and Class C motorhomes with ease. The large evaporator and condenser coils with raised lance fins efficiently dissipate heat, maintaining consistent temperatures even when outside temps climb into the 90s.
Customer reviews consistently praise this model’s quiet operation and longevity. Many owners report 10+ years of trouble-free service with just basic maintenance. The two-speed fan gives you control over airflow—run it on high for rapid cooling, then switch to low for overnight comfort without the noise.
Best for: Travel trailers, Class B and C motorhomes, weekend warriors, budget-conscious buyers who still want quality.
Current price range on Amazon: $800-$1,100 depending on color and bundled ceiling assembly options.
3. Coleman-Mach 47004-079 Mach 8 Plus with Heat Pump – The Low-Profile Marvel 🚐
Here’s something different. The Coleman-Mach 47004-079 Mach 8 Plus is the ultra-low profile champion, sitting just 8.25 inches tall—the lowest aerodynamic profile of any rooftop unit in the entire industry. But don’t let the slim design fool you; this unit packs 15,000 BTUs of cooling power plus a heat pump for year-round climate control.
Key Specifications:
- ✅ 15,000 BTU cooling capacity
- ✅ Heat pump functionality for heating
- ✅ Ultra-low 8.25″ height
- ✅ Industry-exclusive fiberglass basepan
- ✅ Dual motors for consistent performance
- ✅ 100% condensate water removal system
- ✅ Available in Arctic White or Black
- ✅ Roughneck option for off-road applications
The rv air conditioner coleman innovation here lies in the dual-motor design. Unlike traditional units with a single motor powering both the compressor and fan, the Mach 8 Plus uses two motors to deliver the same BTUs of cooling on both high and low speeds. This means better airflow control and quieter nighttime operation.
The integrated condensate removal system is another standout feature. No more water dripping from your RV’s underside or worrying about mold buildup in drain pans. The system evaporates and expels moisture automatically, which is especially valuable in humid climates.
The heat pump capability transforms this from a summer-only solution into a four-season climate system. When temperatures drop, simply switch modes and use electricity instead of propane to heat your rig. This saves money and extends your camping season significantly.
Best for: Van conversions, Class B motorhomes, truck campers, RVers concerned about fuel economy, off-grid enthusiasts, four-season campers.
Current price range on Amazon: $1,400-$1,800 depending on configuration and heat pump options.
4. Coleman Mach 15 Power Saver (Model 48209-0690) – The Efficiency Expert 💡
Efficiency matters, especially when you’re running on generator power or limited shore power. The Coleman Mach 15 Power Saver combines the 15,000 BTU cooling capacity of the standard Mach 15 with power-saving technology that reduces electrical consumption without sacrificing performance.
Key Specifications:
- ✅ 15,000 BTU cooling with power-saving mode
- ✅ Reduced amp draw during startup and operation
- ✅ Quiet operation technology
- ✅ R-410A refrigerant
- ✅ Large condenser coils
- ✅ Black color option
- ✅ Compatible with smaller generators
The Power Saver technology is genuinely useful if you frequently boondock or camp without hookups. Standard RV air conditioners draw significant amps on startup, often requiring 30-amp service or a robust generator. This model reduces that demand, allowing operation on smaller generators (3,500-4,000 watts) that you actually want to carry around.
Beyond the electrical savings, this unit runs noticeably quieter than standard models. Coleman achieved this through improved fan blade design and motor mounting that reduces vibration transfer to the RV’s structure. Your neighbors at the campground will appreciate this thoughtfulness.
Best for: Boondockers, generator-dependent campers, noise-sensitive users, those with smaller electrical systems.
Current price range on Amazon: $1,200-$1,600.
5. Coleman-Mach 47203-079 Mach 8 Plus Signature Series (13,500 BTU) – The Compact Performer 📦
Not everyone needs 15,000 BTUs. The Coleman-Mach 47203-079 Mach 8 Plus offers 13,500 BTUs in the same ultra-low profile design, perfect for smaller rigs or those who prioritize aerodynamics over maximum cooling capacity.
Key Specifications:
- ✅ 13,500 BTU cooling capacity
- ✅ Ultra-low 8.25″ profile
- ✅ Fiberglass basepan construction
- ✅ Dual-motor design
- ✅ Black or white color options
- ✅ Lightweight yet durable
- ✅ Ideal for moderate climates
This coleman rv air conditioner model makes sense for Class B vans, small trailers, and truck campers where every inch of height and every pound of weight affects your vehicle’s performance. The 13,500 BTU capacity handles spaces up to approximately 250 square feet effectively, which covers most compact RV interiors.
The fiberglass basepan is worth noting—it’s an industry exclusive to Coleman’s Mach 8 series. Unlike traditional metal pans that can rust or corrode from condensation, the fiberglass construction remains stable indefinitely. This contributes to the unit’s reputation for longevity, with many owners reporting 15+ years of service.
Best for: Small trailers, pop-ups, van conversions, moderate climates, weight-conscious buyers.
Current price range on Amazon: $1,000-$1,300.
6. Coleman-Mach 47024-079 Mach 8 Plus with Heat Pump and Condensate Pump – The Premium Package 🎁
This is the fully-loaded option. The Coleman-Mach 47024-079 takes the Mach 8 Plus platform and adds both a heat pump and a condensate pump, creating the most versatile climate control solution Coleman offers in a low-profile package.
Key Specifications:
- ✅ 15,000 BTU cooling capacity
- ✅ Heat pump for efficient heating
- ✅ Integrated condensate pump
- ✅ Ultra-low profile design
- ✅ Dual-motor operation
- ✅ 100% moisture removal
- ✅ Black or Arctic White finish
- ✅ Four-season capability
The condensate pump actively removes water instead of relying on gravity drainage. This matters enormously if you park on uneven ground (which is most camping) or if your RV’s drainage system has quirks. No more water pooling under your rig or moisture backing up into the unit.
Combined with the heat pump, this transforms your RV into a genuine year-round living space. Heat pump technology is more efficient than resistance heating, meaning lower electrical costs and better performance in shoulder seasons. It’s not meant to replace your furnace in deep winter, but it handles spring and fall temperatures beautifully.
Best for: Full-time RVers, four-season enthusiasts, premium builds, those seeking the ultimate in comfort and convenience.
Current price range on Amazon: $1,600-$2,000.
7. Coleman-Mach Soft Start Kit (Model 1497-3601) – The Smart Upgrade 🔧
Okay, this isn’t technically an air conditioner, but it’s such a game-changing accessory that it deserves its own spot. The Coleman-Mach Soft Start Kit retrofits onto any Coleman-Mach unit (series 45000, 47000, 48000) and reduces startup amperage by up to 75%.
Key Specifications:
- ✅ Reduces inrush amperage by 75%
- ✅ Extends compressor lifespan
- ✅ Short-cycle protection feature
- ✅ Unibody waterproof enclosure
- ✅ No change to exterior appearance
- ✅ 2-year limited warranty
- ✅ Simple exterior installation
Why does this matter? Standard RV air conditioners require a massive surge of electricity when the compressor kicks on—often 60-70 amps for a split second. This surge causes voltage sag, stresses electrical components, and can trip breakers or overload small generators. The soft start kit eliminates that spike by ramping up power gradually.
Beyond the electrical benefits, this actually extends your air conditioner’s life by reducing mechanical stress on the compressor. Every time your AC cycles on, the compressor experiences wear. Softening that startup cycle means less wear, fewer repairs, and longer overall lifespan.
For those running on generator power, this is transformative. A properly equipped coleman mach rv air conditioner with a soft start kit can run on a 2,000-watt inverter generator, opening up boondocking possibilities you wouldn’t have otherwise.
Best for: Anyone with a Coleman-Mach unit, boondockers, generator users, those with older electrical systems, anyone seeking to extend AC lifespan.
Current price range on Amazon: $180-$250.
🎯 Ready to Beat the Heat? Find Your Perfect Coleman Mach Unit! 🔥
Don’t let another summer trip turn into a sweat fest. These carefully selected coleman mach air conditioner models represent the best options available on Amazon right now. Click on any highlighted product name above to check current pricing, read verified customer reviews, and compare specifications. Whether you need maximum cooling power, ultra-low profile design, or four-season versatility, your ideal RV air conditioner is just a click away!
Quick Comparison: Coleman Mach Models at a Glance
| Model | BTU Rating | Profile Height | Heat Pump | Best Use Case | Approx Price |
|---|---|---|---|---|---|
| Mach 15 | 15,000 | Standard | Optional | Large RVs, Hot Climates | $1,100-$1,500 |
| Mach 3 Plus | 13,500 | Standard | Optional | Most RVs, Best Value | $800-$1,100 |
| Mach 8 Plus (15K) | 15,000 | Ultra-Low 8.25″ | Yes/No | Van Life, Aerodynamics | $1,400-$1,800 |
| Mach 15 Power Saver | 15,000 | Standard | Optional | Boondocking, Generators | $1,200-$1,600 |
| Mach 8 Plus (13.5K) | 13,500 | Ultra-Low 8.25″ | No | Small RVs, Compact | $1,000-$1,300 |
| Mach 8 Plus Premium | 15,000 | Ultra-Low 8.25″ | Yes | Year-Round, Full-Timers | $1,600-$2,000 |
| Soft Start Kit | N/A (Accessory) | N/A | N/A | Any Coleman Unit | $180-$250 |
💬 Just one click – help others make better buying decisions too! 😊
Understanding BTU Ratings and Cooling Capacity
What Does BTU Actually Mean? 🌡️
Let’s demystify this. BTU stands for British Thermal Unit, and it measures how much heat an air conditioner can remove from space in one hour. One BTU represents the energy required to raise one pound of water by one degree Fahrenheit. In practical terms, higher BTU ratings mean more cooling power.
But here’s where it gets interesting—more BTUs don’t automatically mean better performance. You need to match the BTU rating to your RV’s size, insulation quality, window count, and typical climate conditions. Oversizing your air conditioner creates problems just like undersizing does.
An oversized unit (too many BTUs for your space) will cool the air too quickly without running long enough to remove humidity. This leaves your RV feeling clammy and uncomfortable, like a cold basement. The compressor also cycles on and off frequently, which wastes electricity and causes premature wear. Conversely, an undersized unit runs constantly without achieving comfortable temperatures, especially on hot days.
Calculating Your Required BTU Capacity 📊
Here’s a practical formula that works for most RV applications:
Basic Calculation:
- Measure your RV’s interior length × width to get square footage
- Multiply square footage × 20-25 BTUs per square foot for basic cooling
- Add 600 BTUs per person regularly occupying the space
- Add 1,000 BTUs for significant window area (large windshields, panoramic windows)
- Add 600-1,000 BTUs if you cook inside frequently
- Increase by 10% if roof color is dark
- Increase by 10-20% if camping in extreme heat (desert, southern states in summer)
Example: A 25-foot travel trailer might be 8 feet wide × 20 feet long interior = 160 square feet. Using the middle range (22.5 BTU per square foot) = 3,600 BTUs. Add 1,200 BTUs for two people, plus 1,000 for the large front window, plus 600 for cooking, plus 10% for dark roof color = approximately 6,930 BTUs minimum required.
In reality, you’d want a 13,500 BTU unit for this scenario to ensure adequate cooling even on the hottest days without constantly maxing out the system. The extra capacity provides headroom for climate variability and accounts for heat gain from opening doors, operating appliances, and simply moving around.
Climate Considerations That Matter ☀️
Your camping destinations significantly affect cooling requirements. If you’re mostly hitting temperate regions with highs in the 70s-80s, a 13,500 BTU unit handles just about any RV size. But if you’re chasing desert sunsets in July or camping through Texas summers, that same RV might need 15,000 BTUs to stay comfortable.
Humidity plays a huge role too. Humid climates require more cooling capacity because your AC must work harder to remove moisture from the air. Dry heat actually cools more easily—100 degrees in Arizona feels different from 90 degrees in Florida because of moisture content. Plan accordingly when selecting your rv air conditioner coleman mach model.
According to research published by the National Renewable Energy Laboratory, RV air conditioners operate under more challenging conditions than residential units due to limited insulation, metal construction that absorbs heat, and exposure to direct sunlight from all angles.
Installation Process: What You Need to Know
Required Tools and Materials 🔨
Before you start, gather everything you’ll need. Missing a simple tool halfway through installation turns a 2-hour job into an all-day frustration.
Essential Tools:
- ✅ Phillips and flathead screwdrivers
- ✅ 1/4″ and 5/16″ nut drivers
- ✅ Putty knife for old gasket removal
- ✅ Caulking gun with dicor self-leveling sealant
- ✅ Wire strippers and electrical tape
- ✅ Ladder that safely reaches your RV’s roof
- ✅ Multimeter for electrical verification
- ✅ Drill with bits (if mounting new hardware)
- ✅ Measuring tape
- ✅ Level
Required Materials:
- ✅ New air conditioner unit (obviously!)
- ✅ Ceiling assembly/air distribution box (if not included)
- ✅ 14″x14″ gasket kit
- ✅ Roof sealant (Dicor or equivalent)
- ✅ Electrical wire nuts (if rewiring needed)
- ✅ Mounting hardware (usually included with unit)
Step-by-Step Installation Guide 📝
Safety First: Before starting any installation, disconnect shore power and turn off battery disconnect switches. Air conditioner installation involves 120V AC wiring, which can seriously injure or kill you if handled improperly. If you’re not comfortable working with electrical systems, hire a professional. No blog post is worth your life.
Step 1: Remove Old Unit Climb safely onto your RV’s roof (never work alone—have someone spot you). Remove the shroud screws around the perimeter of your existing AC. Most units have 8-12 screws securing the top shroud. Once removed, you’ll see the compressor and condenser assembly.
Disconnect the electrical wiring inside your RV first (with power off!). Note wire positions or take photos before disconnecting anything. Then, from the roof, remove the mounting bolts holding the unit to the roof frame. Most installations use four bolts through corner brackets.
With help, lift the old unit straight up and off the RV. These units weigh 60-90 pounds, so don’t try to solo lift it unless you enjoy back injuries. Set it aside carefully—you might need it for parts reference.
Step 2: Prepare the Opening Clean the mounting area thoroughly. Remove old gasket material with a putty knife, then wipe surfaces clean. Check the roof opening for any cracks, soft spots, or water damage. Address any issues before proceeding—installing a new AC over rotted roof structure creates expensive problems later.
Inspect the ceiling assembly inside your RV. If it’s damaged or you’re switching between ducted and non-ducted configurations, now’s the time to replace or modify it.
Step 3: Install New Gasket and Seal Apply the new 14″x14″ gasket to the roof opening according to the manufacturer’s instructions. Most quality gaskets are self-adhesive with foam compression seals. Press firmly around the entire perimeter to ensure good adhesion.
Apply a bead of self-leveling Dicor or equivalent sealant around the opening edge. Don’t skimp here—water intrusion from poor sealing causes catastrophic damage to RV interiors. Your goal is a weatherproof seal that will last for years.
Step 4: Position and Secure the New Unit With a helper, carefully position your new coleman mach rv air conditioner over the opening. Align the mounting holes with the roof frame brackets. Lower the unit straight down—don’t drag it, as this can compromise the gasket seal.
From inside the RV, thread mounting bolts through the brackets and hand-tighten them. Once all bolts are started, use a socket wrench to tighten them evenly in a star pattern (like tightening wheel lug nuts). This ensures even compression of the gasket.
Step 5: Make Electrical Connections Connect the wiring according to the manufacturer’s diagram and your photos from disassembly. Standard Coleman units use color-coded wires:
- Black: Hot (120V)
- White: Neutral
- Green: Ground
- Low-voltage wiring for thermostat controls (usually 6-wire harness)
Use wire nuts rated for the amperage, and wrap connections with electrical tape for extra security. Ensure all connections are tight—loose wires cause arcing, heat, and potential fires.
Step 6: Test and Commission Before closing everything up, test your installation. Restore power and turn on the unit from the thermostat. Listen for unusual noises and confirm cold air flows from vents. Let it run for 15-20 minutes while monitoring performance.
Check for:
- ✅ Cold air output (should feel noticeably cool within 5 minutes)
- ✅ Proper fan operation on all speeds
- ✅ No water leaks around the ceiling assembly
- ✅ Thermostat responding correctly
- ✅ No unusual vibrations or sounds
If everything checks out, reinstall the shroud cover and secure all screws. Apply a final bead of sealant around the shroud edge for extra protection.
Professional Installation vs DIY 🤔
I’m all for DIY projects when appropriate, but air conditioner installation sits in a gray area. If you have basic mechanical skills, understand electrical systems, and can safely work on a roof, this is a doable weekend project. However, several factors might tip you toward professional installation:
Reasons to hire a pro:
- Your RV has a rubber roof that’s easily damaged
- You’re uncomfortable with electrical work
- Your unit requires modifications to the ceiling assembly or ductwork
- You lack proper tools or safety equipment
- The old unit shows signs of unusual wear suggesting underlying problems
Professional installation typically costs $300-$600 depending on complexity and location. That might seem steep, but it includes proper sealing, electrical code compliance, warranty protection, and peace of mind. Many RV service centers can complete the job in 2-3 hours.
If you choose DIY installation, Coleman-Mach provides detailed instructions with every unit, and numerous YouTube videos demonstrate the process. Just be honest about your skill level—there’s no shame in recognizing when a job exceeds your capabilities.

Coleman Mach Thermostat Options and Upgrades
Factory Thermostat Options 🎚️
Your air conditioner is only as good as the thermostat controlling it. Coleman-Mach offers several factory thermostat options ranging from basic analog controls to sophisticated digital systems.
Analog/Mechanical Thermostats: The simplest option, these use a dial or slider to set temperature. They’re reliable, easy to understand, and require no programming. However, they lack precision—you’re adjusting by feel rather than exact degrees. Models like the Coleman 7330F3852 single-stage heat/cool thermostat fall into this category.
Digital Thermostats: These display exact temperatures and allow precise control. Most feature separate fan and mode settings, LED displays, and better temperature regulation. They’re the standard on newer RVs and significantly improve comfort compared to analog versions.
Programmable/Smart Thermostats: Premium options like Coleman’s wireless thermostats allow scheduling, remote operation, and integration with RV management systems. Some models connect to smartphone apps, letting you pre-cool your RV before returning from activities.
Aftermarket Thermostat Upgrades 📱
The thermostat aftermarket has exploded in recent years, with several companies producing RV-specific smart thermostats that outperform factory options.
EasyTouch RV by Micro-Air: This is the gold standard for RV thermostat upgrades. EasyTouch offers WiFi and Bluetooth connectivity, allowing control from your smartphone regardless of whether you have internet access. The system learns your preferences, provides energy usage data, and integrates with multiple climate control zones.
Installation involves removing your existing Coleman thermostat and connecting the EasyTouch unit using the same wiring. Most users report installation times under 30 minutes. The app interface is intuitive, and the thermostat’s color touchscreen displays weather data, humidity levels, and detailed system information.
Compatibility Considerations: Before purchasing an aftermarket thermostat, verify compatibility with your specific air conditioner model. Most work with standard Coleman-Mach units, but some configurations (especially multi-zone systems or combination heat pump units) require specific versions. Check the manufacturer’s compatibility chart or contact their support team.
The investment in a quality smart thermostat ($250-350) pays dividends in comfort and convenience. Being able to cool your RV from the beach or schedule cooling cycles to match your daily routine transforms how you use your climate control system.
Maximizing Efficiency: Tips to Get the Most From Your Coleman AC
Strategic Positioning and Airflow Optimization 🌪️
Your air conditioner’s cooling capacity is only part of the equation—proper airflow distribution determines actual comfort. Here’s how to optimize your system’s performance:
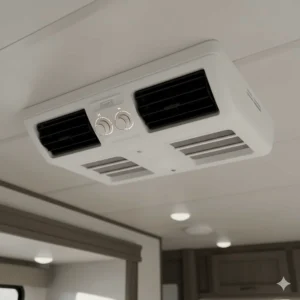
Ducted vs Non-Ducted Configurations: Ducted systems distribute cool air through ceiling vents positioned throughout your RV. This provides even cooling but reduces the total CFM at each vent. Non-ducted systems blow all the air through a central ceiling grille, creating a more powerful cooling effect in one area but potentially leaving distant areas warm.
For RVs longer than 25 feet, ducted systems work better. Shorter rigs often do fine with non-ducted setups, especially if you use fans to circulate air. Some owners install aftermarket duct boosters—small fans that enhance airflow to problematic areas.
RV Airflow Systems: Products like the patent-pending RV Airflow module retrofit into the plenum space between your coleman rv air conditioner and ceiling assembly. These modules eliminate turbulence and optimize air direction into your ductwork, increasing effective cooling by 20-30% according to manufacturer claims. They’re entirely passive (no electrical components), relatively inexpensive ($150-200), and compatible with Coleman Mach 3, 10, and 15 models.
Insulation and Heat Management Strategies 🏠
Keeping heat out is just as important as cooling the interior. These modifications improve efficiency dramatically:
Window Management: Reflective window covers make an enormous difference. Products like Reflectix or custom-fitted insulated window covers reflect radiant heat before it enters your RV. On a sunny 95-degree day, these can reduce cooling load by 30-40%.
Close blinds and curtains on windows facing the sun. Even simple measures like hanging towels over large windshields help. Dark-colored RVs and those with large window areas benefit most from aggressive window management.
Roof Treatment: RV roof color affects cooling load significantly. White or light-colored roofs reflect solar radiation, while dark roofs absorb it. If you’re recoating your roof anyway, choose the lightest color available—it’s free efficiency.
Consider adding roof vent fans (MaxxAir, Fantastic Fan, etc.) to exhaust hot air that accumulates near the ceiling. Running these on exhaust mode while the AC operates creates negative pressure that helps draw cool air through your rig.
Shade Structures: Whenever possible, park in shade. A simple awning on the sunny side of your RV reduces wall heat gain substantially. Some full-timers carry portable shade structures or strategically position vehicles to shade each other at group camping events.
Power Management and Generator Sizing 🔌
Understanding your electrical system’s limitations prevents frustration and equipment damage.
Shore Power Requirements: Most coleman mach rv air conditioner units require 30-amp service to operate reliably. A 13,500 BTU unit draws approximately 13-15 amps while running, plus a 50-70 amp surge on startup (unless you have a soft start kit installed).
If you’re on 15-amp residential power (common at friends’ driveways or older campgrounds), you cannot run your air conditioner along with other appliances without tripping breakers. This is physics, not a suggestion—the circuit simply cannot supply enough electrons.
Generator Considerations: For generator operation, you need at least 3,000 continuous watts to run a standard 13,500 BTU air conditioner. Realistically, 3,500-4,000 watts provides comfortable headroom and allows running a few other items simultaneously.
With a soft start kit installed, you can potentially run the same AC on a 2,000-watt inverter generator, though this leaves no capacity for other loads. Calculate your total power needs carefully when sizing a generator.
Battery and Inverter Operation: Can you run your RV air conditioner on batteries? Technically yes, but practically it’s complicated. A single 13,500 BTU air conditioner draws roughly 120-150 amp-hours per hour of runtime at 12V (accounting for inverter losses). A massive lithium battery bank (800+ amp-hours) combined with a high-quality 3,000W inverter could run an AC for a few hours, but this setup costs thousands of dollars.
Solar charging might extend runtime slightly, but you’d need 1,500+ watts of solar panels under ideal conditions to break even with the AC’s consumption. Most boondockers rely on generators for air conditioning and use batteries for everything else.
Maintenance: Keeping Your Coleman Mach Running Strong
Daily and Weekly Maintenance Tasks ✓
Proper maintenance prevents 90% of air conditioner failures. These simple tasks take minutes but add years to your unit’s life.
Daily (during active use):
- ✅ Check airflow from vents—weak flow indicates dirty filters
- ✅ Listen for unusual sounds (grinding, squealing, or rattling)
- ✅ Verify cold air output; reduced cooling often signals refrigerant issues
- ✅ Ensure thermostat responds correctly to adjustments
Weekly:
- ✅ Clean or replace ceiling assembly filters
- ✅ Inspect condensate drainage (no water pooling under RV)
- ✅ Check exterior shroud for debris or damage
- ✅ Wipe down exposed interior components
Filter maintenance is critical. Dirty filters reduce airflow by up to 50%, forcing your AC to work harder and cool less effectively. Most ceiling assemblies use simple foam or mesh filters that can be vacuumed or washed with mild soap. Let them dry completely before reinstalling.
Monthly and Seasonal Maintenance 🗓️
Monthly (during camping season):
- ✅ Inspect roof sealant around AC unit for cracks or separation
- ✅ Clean condenser coils with gentle spray (no pressure washer!)
- ✅ Tighten any loose mounting hardware
- ✅ Verify proper electrical connections (with power off)
- ✅ Test all thermostat functions and fan speeds
Beginning of Season:
- ✅ Remove shroud and inspect interior components
- ✅ Check compressor mounting and wiring
- ✅ Clean evaporator coils (inside, under ceiling assembly)
- ✅ Test capacitor voltage if you know how (or have it checked)
- ✅ Apply fresh sealant if previous coat shows wear
End of Season:
- ✅ Run AC for 15-20 minutes to circulate refrigerant
- ✅ Clean everything thoroughly before winter storage
- ✅ Cover exterior shroud with AC cover to prevent debris accumulation
- ✅ Consider removing ceiling assembly filters for winter to prevent musty odors
According to research from the Air Conditioning Contractors of America, regular maintenance extends HVAC system lifespan by 40-50% on average, with similar benefits for RV-specific systems.
Troubleshooting Common Issues 🔍
Problem: AC Won’t Turn On
- Check circuit breakers and GFCI outlets
- Verify 120V shore power present
- Test thermostat by switching modes
- Inspect wiring connections at AC and thermostat
- Check compressor capacitor (requires multimeter)
Problem: Weak Cooling
- Clean or replace filters
- Check for blocked or closed vents
- Inspect condenser coils for dirt/debris
- Verify adequate refrigerant (requires professional)
- Ensure outdoor temperature within unit’s operating range
Problem: Excessive Noise
- Tighten loose shroud screws
- Check for debris in fan blades
- Verify all mounting bolts secure
- Inspect rubber isolation mounts for wear
- Consider upgraded fan blade (Mach 8 specific issue)
Problem: Water Leaking Inside
- Check ceiling assembly gasket
- Verify drain system not clogged
- Ensure RV level (improper pitch affects drainage)
- Inspect evaporator coil for ice buildup
- Check condensate pump function (if equipped)
Problem: Frequent Cycling (Short Cycling)
- Thermostat location too close to vents
- Oversized unit for space
- Dirty evaporator coils
- Refrigerant levels incorrect
- Faulty thermostat or control board
Many issues can be resolved with basic troubleshooting, but refrigerant-related problems require EPA-certified technicians. It’s illegal for unlicensed individuals to work with refrigerants, and doing so can damage your rv air conditioner coleman mach unit while creating environmental harm.
When to Replace vs Repair 💭
Age matters. A properly maintained Coleman-Mach unit should last 12-15 years, with some units exceeding 20 years in mild climates with regular care. However, several factors might indicate replacement rather than repair:
Replace if:
- Unit is 15+ years old
- Compressor failure (often costs 60-80% of new unit)
- Multiple component failures within short period
- Refrigerant leaks requiring frequent recharging
- Physical damage to major components
- Available replacement parts limited due to discontinued model
- New technology offers significant benefits (efficiency, features)
Repair if:
- Single component failure (fan motor, capacitor, control board)
- Unit under 8-10 years old
- Recent previous repairs working fine
- Parts readily available
- Repair costs less than 40% of replacement
Sometimes the economics are clear-cut, but often you’re evaluating the risk of additional failures. A 10-year-old unit needing a $200 control board replacement might be worth fixing. The same unit needing a $600 compressor becomes questionable—you’re investing in aging equipment that might fail elsewhere soon.
Consider your camping plans too. If you’re planning a major upgrade or selling your RV soon, minimal repairs make sense. Full-timers investing in long-term comfort should lean toward replacement for peace of mind.
🔥 Don’t Wait Until You’re Melting! 🥵
Summer temperatures don’t wait, and neither should you. These coleman mach rv air conditioner models are ready to ship and transform your RV comfort. Click any highlighted product name to check today’s prices, read real customer experiences, and secure your cooling solution before peak season inventory disappears. Your future comfortable self will thank you! 💨❄️
Industry-Specific Applications and Use Cases
Full-Time RV Living Requirements 🏡
Full-timing demands more from your climate control system than weekend camping. When your RV is your only home, reliable cooling isn’t optional—it’s essential for health, productivity, and quality of life.
Full-Timer Considerations: Full-time RVers face unique challenges. You’re running your AC far more hours annually than recreational users, accelerating wear. You might camp in extreme climates year-round rather than avoiding hot seasons. You likely work remotely, requiring comfortable temperatures during business hours. And you can’t just “tough it out” for a few days—breakdowns mean genuine hardship.
For full-timing, I recommend these upgrades beyond a basic coleman rv air conditioner:
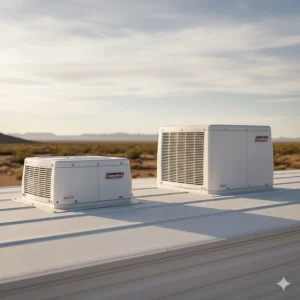
Dual AC Setup: Many full-timers install two air conditioners—one forward, one aft. This provides redundancy (one fails, you still have cooling), better weight distribution, and improved climate control in large RVs. The combined cooling capacity handles extreme heat that would overwhelm a single unit.
Premium Model Selection: Choose models with heat pump capability (like the Mach 8 Plus with heat) for year-round use. The investment pays back through reduced propane consumption and greater temperature flexibility. Power Saver or Quiet Series models reduce generator dependency, crucial for boondocking.
Enhanced Maintenance Schedule: Full-timers should perform monthly maintenance religiously. The increased runtime demands more frequent filter cleaning, coil inspection, and seal checking. Budget for professional service annually—have an RV tech inspect your system, test pressures, and address issues before they become failures.
Extended Warranty Considerations: For a unit you’ll run 8-12 hours daily for years, extended warranties make financial sense. Calculate your expected usage hours and compare against the warranty cost. Most extended warranties pay for themselves if you file just one major claim.
Commercial and Fleet Applications 🚚
RV rental companies, mobile clinics, food trucks, and other commercial operators have specialized needs that recreational users don’t face.
Commercial Durability Needs: Rental RVs get abused. Users don’t maintain them like they would their own equipment, and turnover is constant. Commercial operators need robust units that tolerate neglect and abuse better than standard models.
Coleman’s Roughneck series specifically targets this market. These units feature reinforced components, heavy-duty mounts, and enhanced protection against vibration and impact. They’re overkill for personal use but essential for commercial applications.
Fleet Management: Large RV rental operations manage dozens or hundreds of units. Standardizing on specific Coleman models simplifies inventory management, technician training, and parts stocking. When every unit uses the same AC model, repairs become faster and cheaper.
Fleet managers appreciate Coleman’s nationwide dealer network and parts availability. A broken AC in Maine can be repaired using the same part number stocked for California units. This universality reduces downtime—critical when every day of rental revenue matters.
Mobile Business Applications: Food trucks, mobile medical clinics, and vendor trailers require climate control but face unique constraints. Space limitations favor ultra-low profile units like the Mach 8. Power requirements must consider total electrical load including refrigeration, cooking equipment, or medical devices.
Some mobile businesses operate in stationary mode with shore power, while others rely on generators during events. Calculate your total amp draw carefully—running a 13,500 BTU AC, plus refrigerators, cooking equipment, and lighting often requires 50-amp service or substantial generator capacity.
Advanced Technical Analysis
Refrigeration Cycle and Technology 🔬
Let’s get into the science. Understanding how your coleman mach rv air conditioner actually works helps you make better decisions and troubleshoot effectively.
The Basic Refrigeration Cycle: Your AC uses a closed-loop system that continuously cycles refrigerant through four stages:
- Compression: The compressor pressurizes gaseous refrigerant, raising its temperature significantly (often 150°F+)
- Condensation: Hot, high-pressure gas flows through condenser coils on your RV’s roof where outside air cools it, causing it to condense into high-pressure liquid
- Expansion: The liquid passes through an expansion valve, dropping pressure dramatically and causing temperature to plummet
- Evaporation: Cold, low-pressure liquid flows through evaporator coils inside your RV, absorbing heat from interior air and evaporating back to gas
- The cycle repeats continuously
The genius is that refrigerant’s properties allow it to absorb enormous amounts of heat during evaporation and release it during condensation. This moves heat from inside your RV to outside, creating the cooling effect you feel.
R-410A Refrigerant: Modern Coleman units use R-410A refrigerant, which replaced the older R-22 that was phased out due to ozone depletion concerns. R-410A is more environmentally friendly and actually more efficient at heat transfer, though it requires higher operating pressures.
You cannot simply refill a leaking system—refrigerant must be evacuated, leaks repaired, then recharged to precise specifications. This requires specialized equipment and EPA certification. Backyard mechanics adding refrigerant “by feel” create more problems than they solve.
Heat Pump Technology: Heat pump models reverse the refrigeration cycle. Instead of moving heat from inside to outside, they move heat from outside to inside, warming your RV. This works efficiently in moderate temperatures (down to about 35-40°F), after which supplemental heating is needed.
Heat pumps are more efficient than resistance heating because they move heat rather than creating it. You get roughly 3 watts of heating for every watt of electricity consumed—impressive compared to resistance heaters that produce 1 watt of heat per watt of electricity.
Energy Efficiency Metrics and Real-World Performance 📈
EER (Energy Efficiency Ratio): EER measures cooling output (BTUs) divided by power input (watts) at standard test conditions. Higher numbers mean better efficiency. Most Coleman units achieve EER ratings of 9-11, which is respectable for rooftop RV applications.
However, real-world efficiency varies enormously based on outdoor temperature, humidity, installation quality, and maintenance. A unit with EER 10.5 might perform at EER 8.5 on a 105°F day or EER 11.5 on a mild 80°F evening.
SEER (Seasonal Energy Efficiency Ratio): SEER averages efficiency across a range of temperatures, giving a more realistic picture of annual performance. Most RV air conditioners don’t carry SEER ratings because they’re not tested under the same standards as residential units, but understanding the concept helps.
Power Consumption Calculations: A 13,500 BTU unit typically draws 12-15 amps during operation (1,440-1,800 watts at 120V). Over 8 hours of runtime, that’s approximately 11.5-14.4 kWh of electricity. At average campground rates ($0.30-0.50/kWh), you’re looking at $3.45-7.20 per day to run your AC.
With solar panels, you’d need 1,500+ watts of capacity under ideal conditions just to break even with AC consumption—and that’s before accounting for other electrical loads. This math explains why boondocking with AC requires generators or massive battery banks.
Material Science and Durability Engineering 🛡️
All-Copper Tubing Construction: Coleman’s insistence on all-copper tubing isn’t just marketing. Copper has excellent thermal conductivity, corrosion resistance, and durability. Aluminum tubing (used by some competitors) is lighter but more prone to vibration damage and corrosion from road salt and environmental exposure.
The gas-flux brazing process joins copper tubes without traditional filler metals that can weaken over time. This creates virtually indestructible joints that withstand years of vibration and temperature cycling.
Condenser Coil Design: Coleman’s raised lance fin design increases surface area while channeling airflow efficiently through the condenser. This engineering detail improves heat dissipation without increasing weight or size. The fins are copper or aluminum (depending on model), with spacing optimized for RV conditions.
Dirty condenser coils lose 20-40% efficiency, which is why cleaning them seasonally matters so much. The raised fin design actually helps shed dirt and debris, though it’s not self-cleaning.
Shroud Engineering: The exterior shroud serves multiple purposes beyond aesthetics. It protects components from road debris and weather, channels airflow across the condenser, reduces noise transmission, and helps shed water away from vulnerable areas.
Coleman’s streamlined shroud design reduces drag compared to boxy competitors. This matters more than you’d think—at highway speeds, roof-mounted equipment creates significant aerodynamic penalty. Better design means slightly better fuel economy and reduced wind noise.
Comprehensive Setup and Installation Guide
Pre-Installation Preparation and Planning 📋
Before you crack open that box, proper planning prevents installation headaches.
Roof Structural Assessment: Your RV’s roof must support the air conditioner’s weight (60-90 pounds) plus snow load, maintenance personnel weight, and dynamic stress from driving. Most roofs are fine, but older units or those with previous water damage need inspection.
Walk the roof (carefully!) while looking for soft spots, flexing, or visible damage. If you find issues, repair them before installing your AC. Water damage only gets worse, and additional weight accelerates deterioration.
Electrical System Verification: Confirm you have adequate electrical capacity. A 30-amp RV electrical system handles one 13,500 BTU air conditioner plus moderate other loads. Two ACs or a 15,000 BTU unit typically require 50-amp service.
Check your circuit breaker panel, shore power cord rating, and transfer switch capacity. If upgrading from a smaller AC or adding a second unit, you may need electrical system modifications.
Ducted vs Non-Ducted Decision: This choice affects comfort, installation complexity, and cooling distribution. Ducted systems require proper ductwork, multiple ceiling vents, and balanced airflow. Non-ducted systems concentrate cooling in one area but install simpler and deliver stronger airflow at the source.
For RVs over 28 feet or with multiple rooms/slide-outs, ducted systems work better. Smaller, open-plan rigs do fine with non-ducted setups plus supplemental fans.
Ceiling Assembly Selection and Configuration 🏗️
The ceiling assembly (also called air distribution box) is the interior component that connects your rooftop unit to the RV’s living space. Coleman offers several configurations:
Non-Ducted Assemblies: Simple grille-style units that direct all airflow straight down into the main living area. These deliver the strongest cooling in one location and work well with fans to circulate air throughout the space.
Ducted Assemblies: Connect to ductwork that distributes cool air through ceiling vents. Coleman offers both standard and “Chillgrille” ducted versions, with the latter adding a more finished appearance and better airflow control.
Heat-Ready Assemblies: If you’re planning to add the optional heating element later, purchase a heat-ready assembly now. Retrofitting later requires replacing the entire assembly—much easier to install it correctly the first time.
Color and Finish Options: Match your RV’s interior with white, black, or other color options. While purely aesthetic, this attention to detail makes the installation look professional rather than aftermarket.
Advanced Installation Techniques ⚙️
Proper Gasket Installation: The gasket is your first line of defense against water intrusion. Don’t rush this step. Clean the mounting surface thoroughly, removing old sealant with a plastic scraper (metal scratches gel-coat and rubber roofs).
Apply the gasket with even pressure around the entire perimeter. If using a self-adhesive gasket, work in cool temperatures (below 85°F) so adhesive doesn’t become too tacky. Press firmly and ensure no wrinkles or gaps.
Some installers add a bead of sealant under the gasket for extra insurance. While not required with quality gaskets, this provides peace of mind in harsh climates.
Sealant Application Best Practices: Use self-leveling lap sealant specifically designed for RV roofs (Dicor, Geocel Pro Flex, Sikaflex). Regular silicone or household caulk doesn’t flex with RV movement and fails prematurely.
Apply sealant in moderate temperatures (50-80°F) for best results. Too cold and it won’t flow properly; too hot and it runs too thin. Work in overcast conditions or early morning to avoid direct sun on fresh sealant.
Create a continuous bead without gaps. Too much is better than too little—excess can be trimmed after curing, but insufficient coverage creates leak paths.
Electrical Connection Security: All wire connections must be mechanical (wire nuts or terminal blocks) and secure. Wrap connections with electrical tape and secure wire bundles away from moving parts.
Use strain relief where wires enter the unit to prevent vibration from working connections loose. Some installers add dielectric grease to connections to prevent corrosion—optional but worthwhile in coastal or humid environments.
Vibration Isolation: Coleman units include rubber isolation mounts between the unit and roof mounting brackets. Ensure these are properly positioned and not over-compressed. Proper isolation reduces noise transmission and mechanical wear.
Some installers add additional rubber washers or isolation pads under mounting bolts for extra vibration dampening. This is particularly helpful for older RVs or those with thin roof structures that transmit noise easily.
Post-Installation Testing Protocol ✅
Don’t just turn it on and call it done. Thorough testing now prevents problems later.
Initial Power-Up Sequence:
- Verify all electrical connections secure
- Restore shore power
- Set thermostat to coolest setting
- Wait 3-5 minutes before compressor starts (built-in delay is normal)
- Listen for unusual sounds during startup
- Confirm cold air within 5-10 minutes
- Test all fan speeds
- Cycle unit off and back on to verify thermostat control
- Run for 30-60 minutes while monitoring performance
Airflow Testing: Check airflow at all vents (ducted systems) or the main grille (non-ducted). Use your hand to feel air velocity—it should be strong and consistent. Weak airflow suggests blocked ducts, pinched flex duct, or improperly installed ceiling assembly.
Temperature Drop Verification: Use a thermometer to measure supply air temperature (air coming from vents) and return air temperature (room air entering the ceiling assembly). The difference should be 18-25°F typically. Less than 15°F suggests low refrigerant, dirty coils, or airflow restrictions. More than 28°F might indicate oversized unit or low outdoor temperature.
Leak Inspection: From inside, inspect the ceiling assembly perimeter for any moisture. Run your hand along the edges feeling for dampness. If you find any, immediately shut down and address the seal before water damage occurs.
Vibration and Noise Assessment: With the unit running, place your hand on various interior surfaces (ceiling, walls, cabinets). Excessive vibration suggests loose mounting bolts or worn isolation mounts. Some vibration is normal, but the RV shouldn’t shake.
Listen for unusual sounds: grinding (worn bearings), squealing (belt or fan issues), rattling (loose components), or hissing (refrigerant leak). Normal sounds include steady fan noise, compressor hum, and occasional clicking of relays.
Break-In Period Recommendations 🆕
New Coleman units benefit from a gentle break-in during the first few days of operation.
First 24 Hours: Run the unit on low fan speed for shorter cycles (2-3 hours) rather than all-day operation. This allows components to seat properly and oils to distribute through the system.
First Week: Gradually increase runtime to normal use patterns. Monitor performance daily—note any changes in cooling capacity, noise levels, or unusual behaviors.
First Month: Inspect roof sealant weekly. New sealant shrinks slightly as it cures, sometimes creating small gaps. Touch up as needed.
After 30 days of regular use, perform your first maintenance inspection: clean filters, check mounting hardware, verify electrical connections, and inspect for any issues. This early checkup catches manufacturing defects or installation problems while they’re easy to address.
Maintenance and Longevity Strategies
Comprehensive Maintenance Schedule 📅
Proper maintenance extends your rv air conditioner coleman lifespan by years while maintaining peak efficiency.
Daily Tasks (Active Use Season):
- Quick visual inspection of thermostat function
- Listen for unusual sounds during operation
- Verify cold air output meets expectations
- Check for water drips or unexpected moisture
Weekly Tasks:
- Clean or vacuum filters in ceiling assembly
- Quick visual inspection of exterior shroud
- Wipe down ceiling assembly grille
- Verify proper drainage (no water pooling)
Monthly Tasks:
- Remove and wash filters thoroughly
- Inspect roof sealant around unit
- Clean exterior shroud and fins with gentle water spray
- Check mounting hardware tightness
- Verify thermostat accuracy with separate thermometer
Quarterly Tasks:
- Remove shroud for detailed inspection
- Clean condenser coils thoroughly
- Inspect wiring and connections
- Lubricate fan motor if applicable (many are sealed)
- Check capacitor for bulging or leaking (requires multimeter)
Annual Tasks:
- Complete system service by qualified technician
- Replace filters even if they look clean
- Re-seal roof penetration
- Test heating element if equipped
- Verify refrigerant pressures (requires gauges)
Bi-Annual Tasks:
- Deep clean evaporator coils (inside, under ceiling assembly)
- Inspect and clean drain system thoroughly
- Check rubber isolation mounts for deterioration
- Verify proper electrical ground
- Update thermostat batteries if applicable
Specific Maintenance Procedures 🔧
Filter Cleaning Technique: Remove filters and vacuum both sides with a brush attachment. For deeper cleaning, wash with warm water and mild dish soap. Rinse thoroughly and allow to air dry completely—damp filters promote mold growth. Never reinstall wet filters.
Replace filters annually regardless of appearance. Foam and mesh break down over time, reducing effectiveness even when they look fine. Quality replacement filters cost $10-20—cheap insurance for your expensive AC.
Condenser Coil Cleaning: Use a garden hose with gentle spray pattern (no pressure washer!). Spray from inside out, pushing debris away from the fins rather than deeper into them. Work from multiple angles to ensure thorough cleaning.
For heavy buildup, use coil cleaner specifically designed for aluminum fins. Follow product directions carefully—most require spraying, waiting 5-10 minutes, then rinsing thoroughly. Don’t let cleaner sit too long or it can corrode fins.
Evaporator Coil Access: The evaporator sits under your ceiling assembly. Access requires removing the assembly or working through limited openings. Some assemblies have removable panels for maintenance access.
Clean evaporator coils annually at minimum. These collect dust, pet hair, and debris that restricts airflow. Use a soft brush and vacuum, or specialized coil cleaner. Be gentle—damaging fins reduces efficiency.
Drain System Maintenance: Coleman units either use gravity drainage or active condensate removal systems. Gravity systems require proper RV leveling and clear drain lines. Inspect drain holes monthly, clearing any debris.
Units with condensate removal systems have small pumps that actively expel water. Check pump operation during season start—you should hear it cycle on when condensate accumulates. Clean the collection pan and pump inlet to prevent clogs.
Troubleshooting Decision Trees 🌳
Issue: Unit Won’t Start
- Check power source
- Shore power connected? → Yes → Check breaker panel
- Breaker tripped? → Yes → Reset and retest
- If trips immediately → Electrical fault, call technician
- No power at all? → Check campground power/generator
- Check thermostat
- Thermostat display active? → No → Dead batteries or wiring issue
- Set below room temperature? → No → Adjust settings
- Fan works but compressor doesn’t start? → Capacitor or compressor issue
- Listen for clicking
- Relay clicking but no compressor? → Capacitor failure likely
- No clicking at all? → Control board or wiring issue
- Humming but not starting? → Locked compressor (major failure)
Issue: Weak or No Cooling
- Check airflow
- Filters clean? → No → Clean/replace filters, retest
- Vents blocked? → Yes → Clear obstructions
- Fan running? → No → Motor or wiring issue
- Check coils
- Condenser dirty? → Yes → Clean coils, retest after 30 minutes
- Evaporator iced up? → Yes → Turn off compressor, run fan only to melt ice
- Check refrigerant (requires gauges)
- Low pressure? → Refrigerant leak, requires professional repair
- High pressure? → Overcharged or restricted airflow
- Normal pressure but warm air? → Compressor failing
Issue: Excessive Noise
- Identify noise source
- From roof? → Loose shroud, debris, or failing condenser fan
- From ceiling? → Blower wheel rubbing or loose assembly mounting
- Clicking/rattling? → Check all mounting hardware
- Squealing? → Fan motor bearings wearing
- Check components
- Remove shroud, inspect condenser fan blade for damage
- Verify all screws tight on both roof unit and ceiling assembly
- Check rubber isolation mounts—if flat or torn, replace
- Spin fan blades by hand with power off—should rotate freely
- Structural issues
- Noise worse while driving? → Mounting system inadequate
- Noise only during cooling? → Thermal expansion sounds (normal)
- Vibration throughout RV? → Isolation mounts failed or missing
Parts Replacement Guidelines 🔩
Common Parts and Replacement Intervals:
- Capacitors: 3-7 years depending on heat exposure and cycling frequency ($15-40 part)
- Fan Motors: 8-12 years with proper lubrication ($80-150 part)
- Control Boards: 10-15 years, often outlast other components ($100-200 part)
- Thermostats: 5-10 years depending on type ($40-300 part)
- Compressor: 12-20 years with proper maintenance ($400-700 part + $200-400 labor)
When DIY Is Appropriate:
- Replacing filters, cleaning coils, tightening hardware: Always DIY-friendly
- Capacitor replacement: DIY if you’re comfortable with electrical work and have multimeter
- Fan motor replacement: Moderate difficulty, requires careful wiring documentation
- Control board replacement: DIY possible but requires electrical knowledge
- Thermostat replacement: Usually straightforward DIY with color-matched wiring
When to Call Professionals:
- Any refrigerant-related work (EPA certification required by law)
- Compressor replacement
- Major electrical issues or wiring modifications
- Structural repairs to roof or mounting system
- Warranty work that requires authorized service centers
- Anything you’re uncomfortable attempting—mistakes cost more than professional service
Cost of Ownership Analysis 💵
5-Year Ownership Costs (13,500 BTU Coleman Mach 3 Plus Example):
Initial Purchase:
- Unit: $900
- Installation (if professional): $400
- Gaskets and sealant: $50
- Total initial: $1,350 (or $950 DIY install)
Annual Operating Costs:
- Electricity (3 months, 4 hours/day average): $165-275
- Filters: $15
- Maintenance supplies: $25
- Professional annual service (recommended): $150
- Total annual: $355-465
Periodic Maintenance:
- Capacitor replacement (once): $75
- Sealant refresh (years 3, 5): $60
- Total 5-year periodic: $195
5-Year Total: Approximately $3,500-4,100 for professional maintenance route, or $2,800-3,300 for capable DIYers.
This calculates to $700-820 annually, or $58-68 monthly for comfortable climate control. Compare to hotel costs or medical issues from heat exposure, and quality air conditioning is clearly worthwhile.
15-Year Lifespan Projection: With excellent maintenance, expect 12-15 years from quality Coleman units. Some owners report 20+ years in mild climates with meticulous care. Over 15 years at $65 monthly average, you’re looking at $11,700 total—less than $800 annually for year-round comfort and safety.
Comparative Analysis: Coleman vs Competitors
Dometic Penguin vs Coleman Mach 🐧 vs ❄️
Dometic is Coleman’s primary competitor, offering the Penguin series rooftop units. Let’s compare honestly.
Dometic Advantages:
- Quieter operation (claimed 30% quieter than industry average)
- Integrated controls with diagnostic displays
- Slightly lighter weight in some models
- Modern aesthetic with streamlined shrouds
Coleman Advantages:
- Wider range of BTU options and configurations
- Better parts availability and dealer network
- Lower average cost for comparable BTU ratings
- Proven track record with 50+ years of continuous production
- All-copper tubing vs mixed materials in some Dometic models
Performance Comparison: In real-world testing, Coleman and Dometic units perform comparably when properly sized and maintained. Dometic’s noise advantage is real but marginal—3-5 dB difference that you’ll only notice in very quiet environments.
Price Comparison: Coleman typically costs 10-20% less than equivalent Dometic units. For a 13,500 BTU non-ducted model: Coleman $850-1,000 vs Dometic $950-1,200. This gap widens with premium features.
Recommendation: For budget-conscious buyers or those prioritizing parts availability, Coleman wins. For noise-sensitive users willing to pay premium prices, Dometic merits consideration. Most RVers will be equally happy with either brand.
RecPro and Other Value Brands 💰
Several economy brands (RecPro, KINGRVER, others) offer significantly cheaper RV air conditioners. Are they worth it?
Value Brand Advantages:
- Lower purchase price ($600-800 for 15K BTU units)
- Often include both ducted and non-ducted ceiling assemblies
- Amazon Prime shipping available
- Heat pump standard on many models
Value Brand Disadvantages:
- Limited track record—many brands less than 5 years old
- Questionable parts availability long-term
- Mixed customer reviews regarding longevity
- Unknown quality of internal components
- Limited dealer network for warranty service
Realistic Assessment: Budget brands fill a niche for owners planning to keep RVs short-term, those on tight budgets, or backup/secondary units. However, for primary climate control in a serious camping rig, established brands like Coleman provide better long-term value despite higher initial cost.
The $200-400 saved upfront disappears quickly if the unit fails prematurely or requires expensive repairs. Coleman’s track record and support infrastructure justify the premium for most users.
Traditional vs Modern Approaches 🆚
Rooftop AC vs Portable Units: Some owners consider portable AC units as alternatives to rooftop installations. Let’s evaluate realistically.
Portable Unit Advantages:
- No roof installation required
- Can move between RVs or use at home
- Lower initial cost ($300-600)
- Easy storage when not needed
Rooftop Unit Advantages (Coleman Mach):
- Much higher cooling capacity per amp (more efficient)
- No floor space consumed
- Proper ventilation of heat outside RV
- No condensate drainage issues
- Better airflow distribution
- Designed specifically for RV vibration and movement
Reality Check: Portable units work as supplemental cooling in small spaces (pop-up tent areas, small trailers under 20 feet) but cannot replace a proper rooftop AC in anything larger. The efficiency gap is enormous—portable units might draw 10 amps to produce 8,000-10,000 BTUs, while rooftop units draw 12-15 amps for 13,500-15,000 BTUs.
Swamp Coolers (Evaporative Coolers): In dry climates (Southwest), evaporative coolers offer an alternative approach. These use water evaporation to cool air, consuming far less electricity than refrigerant-based ACs.
Evaporative Advantages:
- 75% lower electricity usage
- Simple mechanical design
- Inexpensive to purchase and maintain
Evaporative Limitations:
- Only effective in low humidity (below 30-40%)
- Adds moisture to air (problematic in humid regions)
- Requires constant water supply
- Less effective cooling (10-20°F drop vs 20-30°F drop)
Regional Recommendation: If you camp exclusively in desert Southwest with humidity consistently below 30%, evaporative coolers merit consideration as supplemental or primary cooling. For everyone else, refrigerant-based Coleman units are the better choice.
Price-to-Benefit Ratio Analysis 📈
Budget Option ($800-1,100): Coleman Mach 3 Plus – Best value for most users. Proven reliability, adequate cooling for average RVs, widely available parts, straightforward installation. You’re getting 90% of what premium units offer at 60% of the cost.
Value Proposition Score: 9.5/10
Mid-Range ($1,100-1,500): Coleman Mach 15 or Mach 15 Power Saver – Extra cooling capacity for large RVs or extreme heat. Power saving features benefit generator users. Diminishing returns vs Mach 3 unless you specifically need extra capacity.
Value Proposition Score: 7.5/10
Premium ($1,400-2,000): Coleman Mach 8 Plus with Heat Pump – Ultra-low profile, year-round capability, condensate removal, four-season comfort. Significant premium but delivers real benefits for specific users (full-timers, off-grid, extreme climates).
**Value Proposition Score: 8/10 (for target users), 6/10 (for casual campers)
Accessory ($180-250): Soft Start Kit – Transforms existing units’ power requirements. If you boondock or use generators frequently, this is the highest-ROI purchase you can make. If you’re always on shore power, it’s unnecessary.
**Value Proposition Score: 10/10 (boondockers), 5/10 (shore power only)
Case Studies and Success Stories
Case Study 1: Full-Time Family’s Cooling Solution 👨👩👧👦
Background: The Martinez family—parents and two children—sold their house in 2022 to full-time RV in a 38-foot fifth wheel. They travel year-round, including summer months in Texas and Arizona where temperatures regularly exceed 100°F.
Challenge: Their RV came with a single 13,500 BTU Coleman unit that struggled to maintain comfortable temperatures during peak heat. The kids’ bunk area at the rear stayed 10-15°F warmer than the main living space, making sleep difficult.
Solution: They installed a second Coleman Mach 3 Plus unit over the bedroom area, creating a dual-AC setup. Total investment: $1,350 including professional installation of the second unit.
Results:
- Even temperature distribution throughout 38-foot rig
- Each AC draws approximately 14 amps, total 28 amps well within 50-amp service limits
- Redundancy provides peace of mind—one AC failure doesn’t leave them without cooling
- Reduced runtime per unit (each runs 4-5 hours daily vs one running 10+ hours)
- Lower maintenance costs per unit due to reduced wear
Key Takeaway: The Martinez family reports the dual-AC investment was “life-changing” for full-timing in hot climates. Their only regret was not installing it sooner. The reduced stress and improved sleep quality justified the cost within the first summer.
Cost-Benefit Analysis: Initial investment: $1,350. Electricity cost increase: ~$40/month in peak season. Extended lifespan of both units due to reduced individual runtime: valuable but hard to quantify. Improved quality of life: priceless for full-time family.
Case Study 2: Off-Grid Boondocker’s Generator-Free Setup 🏕️
Background: Dave, a solo RVer, camps primarily on BLM land in the Southwest, often staying 2-3 weeks in one location. He prefers quiet, generator-free camping but still wants air conditioning during hot days.
Challenge: Running a standard coleman rv air conditioner requires 2,500+ watts of generator power, which Dave finds loud and disruptive to the peaceful camping experience he seeks. He also wanted to minimize fossil fuel consumption.
Solution: Dave installed a Coleman Mach 3 Plus with a Soft Start Kit, paired with 800 amp-hours of lithium batteries, 800 watts of solar panels, and a 3,000-watt inverter. Total system cost: $6,200 (including batteries and solar).
Results:
- Can run AC 3-4 hours during hottest part of day (noon-4pm) on battery power alone
- Solar panels recharge batteries by next morning in sunny conditions
- Soft start kit reduced startup surge from 65 amps to 18 amps, making battery operation practical
- Eliminates generator use 80% of the time
- Quiet, peaceful camping experience maintained
Limitations: System works in sunny, dry climates (Southwest desert). Cloudy conditions or consecutive hot days still require generator backup. Not practical in humid regions where AC needs to run longer hours.
Key Takeaway: With appropriate supporting infrastructure (large battery bank, sufficient solar, soft start kit), battery-powered AC operation is viable for limited duration in optimal conditions. This approach targets specific use cases, not universal applicability.
Cost-Benefit Analysis: High initial investment ($6,200) but delivers Dave’s desired camping experience. Fuel savings: approximately $30/week vs generator operation. Payback period: ~5 years on fuel savings alone, but immediate quality-of-life improvement justified the cost for Dave’s priorities.
Case Study 3: Budget RV Renovation Success 🔧
Background: Sarah purchased a 1998 travel trailer for $5,000, planning a DIY renovation. The original air conditioner was 25+ years old, inefficient, and leaking refrigerant. Repair estimates exceeded replacement cost.
Challenge: Limited budget ($800) for AC replacement. Needed reliable cooling but couldn’t justify premium features or professional installation. First-time DIY installation requiring careful attention to avoid costly mistakes.
Solution: Sarah purchased a Coleman Mach 3 Plus (model 48203C969) for $850, gasket kit ($25), and sealant ($20). She watched online tutorials, borrowed tools from friends, and completed installation herself over one weekend.
Results:
- Total cost: $895 (vs $1,300+ for professional installation)
- Installation took approximately 6 hours including removing old unit
- Unit operates flawlessly through two summers of regular use
- Significantly improved cooling vs old unit (modern efficiency standards)
- Confidence gained from successful DIY project
Challenges Faced:
- Lifting old unit off roof required helper
- Old sealant removal took longer than expected (very stubborn)
- Initial thermostat wiring confusion resolved with manufacturer support call
- First-time roof work anxiety overcome through careful planning
Key Takeaway: DIY AC installation is feasible for mechanically inclined individuals with patience and attention to detail. Sarah’s success demonstrates that budget constraints don’t necessarily require sacrificing quality—Coleman’s reputation and parts availability make it DIY-friendly.
Cost-Benefit Analysis: Saved $400+ in installation costs. Investment of 6 hours labor vs paying professional. Gained valuable skills applicable to future RV maintenance. No regrets about DIY approach, though she admits having an experienced friend available for questions provided valuable support.
Case Study 4: Commercial Food Truck Implementation 🚚
Background: Roberto operates a gourmet food truck in Miami, Florida, serving at festivals and events year-round. His truck requires climate control for food safety, employee comfort, and customer experience.
Challenge: Extreme heat, high humidity, and constant generator operation create harsh conditions for air conditioning equipment. Previous budget AC failed after 18 months. Needed rugged, reliable cooling that tolerates daily use in commercial environment.
Solution: Roberto upgraded to Coleman Mach 8 Plus Roughneck (model for heavy-duty applications) paired with a 5,500-watt diesel generator. Total investment: $2,100 including unit and generator.
Results:
- Withstood 18 months of 8-10 hour daily operation (3,000+ hours) with zero failures
- Low-profile design improved fuel economy vs taller units
- Adequate cooling for 150-square-foot truck interior despite extreme conditions
- Professional appearance important for food truck aesthetics
- Generator sizing appropriate for AC plus other equipment
Operational Notes: Roberto performs aggressive maintenance: filter cleaning daily, coil cleaning monthly, professional service every 200 operating hours. This preventive approach minimizes downtime—critical for commercial operation.
Key Takeaway: Commercial applications demand robust equipment and rigorous maintenance. Coleman’s Roughneck series specifically targets this market, and Roberto’s experience validates the need for commercial-grade units in harsh environments.
Cost-Benefit Analysis: Higher initial cost ($2,100 vs $600-800 for budget options) but delivered 18+ months trouble-free operation vs competitors that failed in 12-18 months. Roberto calculates lost revenue from AC failure at $500+/day, making reliability the primary consideration over purchase price.

Future Trends and Market Evolution
Emerging Technologies in RV Climate Control 🔮
The RV air conditioning market is evolving rapidly, driven by changing consumer expectations, environmental regulations, and technological advancement.
Variable-Speed Compressor Technology: Traditional RV air conditioners operate at single-speed—either on or off. Variable-speed compressors can modulate between 20-100% capacity, matching cooling output to actual demand. This improves efficiency by 20-40% and eliminates the temperature swings associated with on/off cycling.
Coleman and other manufacturers are testing variable-speed units for RV applications. Challenges include higher cost, increased complexity, and the need for more sophisticated control systems. Expect to see these hit the market within 2-3 years at premium price points.
Refrigerant Evolution: R-410A currently dominates the market, but environmental concerns continue driving refrigerant development. R-32 is already appearing in some Coleman units—it has lower global warming potential and better efficiency than R-410A.
Future refrigerants will likely focus on even lower environmental impact while maintaining or improving performance. Industry experts predict another refrigerant transition within 5-10 years, similar to the R-22 to R-410A change that occurred in the 2010s.
Smart Control Systems: WiFi-enabled thermostats and smartphone apps are becoming standard rather than premium options. Future systems will integrate with comprehensive RV management systems, allowing centralized control of climate, lighting, security, and utilities.
Expect to see predictive cooling that learns your preferences and adjusts automatically based on weather forecasts, occupancy patterns, and time of day. Voice control through Amazon Alexa or Google Assistant is already available in aftermarket thermostats and will likely become factory-standard.
Sustainability and Environmental Considerations ♻️
Environmental consciousness is reshaping consumer preferences and regulatory requirements.
Energy Efficiency Mandates: The U.S. Department of Energy periodically updates minimum efficiency standards for air conditioners. Future regulations will likely require higher SEER ratings for RV units, driving manufacturers toward more efficient designs.
Coleman and competitors are investing in research to meet these standards without significantly increasing costs or reducing reliability—a challenging balance for mobile applications.
Solar Integration: As solar panel efficiency improves and lithium battery costs drop, solar-powered air conditioning becomes increasingly practical. Current systems require 1,500+ watts of solar for AC operation, but improving technology may reduce this to 800-1,000 watts within 5 years.
Future coleman mach rv air conditioner models might include solar integration options from the factory, with charge controllers and battery management systems designed specifically for AC operation.
Refrigerant Environmental Impact: The HVAC industry is under pressure to eliminate high-GWP (global warming potential) refrigerants. While R-410A is much better than older R-22, it’s still not ideal. R-32 and future alternatives will continue reducing environmental impact.
According to research from the Environmental Protection Agency, the transition to low-GWP refrigerants in mobile applications presents unique challenges due to operating conditions and safety requirements.
Market Trends and Consumer Behavior 📊
Full-Time RVing Growth: The pandemic accelerated a trend toward full-time RV living and remote work. This demographic demands residential-quality comfort from their climate control systems, driving interest in premium features, multi-zone systems, and four-season capability.
Coleman has responded with expanded heat pump offerings and quieter operation models. This trend will likely continue, with manufacturers focusing on features that appeal to full-timers rather than weekend warriors.
Van Life and Compact RVs: Class B vans and small camper vans represent fast-growing market segments. These require ultra-low profile units like the Mach 8 series but with residential-level efficiency and features.
Expect to see dedicated “van conversion” AC models optimized for these specific applications, potentially including split systems (separate indoor and outdoor units) that better fit van geometries.
Direct-to-Consumer Sales: Traditional RV parts distribution through dealers and service centers is supplemented increasingly by Amazon and online retailers. This shift gives consumers better pricing and selection but reduces access to expert guidance.
Manufacturers like Coleman are adapting by providing better online resources, video tutorials, and direct customer support to compensate for reduced dealer involvement.
Innovation Directions and Upcoming Developments 🚀
Thermoelectric Cooling: Solid-state cooling using Peltier effect technology eliminates traditional compressors, refrigerants, and moving parts. Current limitations include lower efficiency and limited cooling capacity, but ongoing research addresses these challenges.
If efficiency improves to competitive levels, thermoelectric coolers could revolutionize RV air conditioning—silent operation, zero maintenance, and no environmental concerns from refrigerant leaks.
Heat Pump Optimization: Current heat pump models work effectively down to approximately 35-40°F outdoor temperature. Advanced refrigerants and improved cycle control could extend this to 10-20°F, making heat pumps viable replacements for propane furnaces in most climates.
This would significantly benefit full-time RVers by reducing propane consumption and providing more consistent heating.
Modular/Expandable Systems: Future designs might allow adding cooling capacity by installing modular components rather than complete additional units. Imagine a system where you start with base 10,000 BTU capacity and add “booster modules” for additional 5,000 BTU increments as needed.
Noise Reduction Technology: Consumer demand for quieter operation drives ongoing research into vibration isolation, fan blade design, and sound-dampening materials. Future units might achieve residential-level quiet operation (below 50 dB) even during peak cooling.
Investment and Purchase Decision Framework
Total Cost of Ownership Calculator 💰
Making smart RV air conditioner decisions requires looking beyond sticker price to lifetime costs.
TCO Components:
- Purchase Price: $800-2,000 depending on model and features
- Installation: $0 (DIY) to $600 (professional complex install)
- Operating Costs: $150-400 annually depending on usage
- Maintenance: $50-150 annually (DIY) or $200-400 (professional service)
- Repairs: $200-800 over 10-year lifespan (average)
- Replacement Parts: $100-300 periodically (filters, capacitors, etc.)
10-Year TCO Example (Coleman Mach 3 Plus):
- Purchase: $900
- Installation (DIY): $50
- Operating (moderate use): $2,500
- Maintenance (mostly DIY): $1,200
- Repairs (one capacitor, one fan motor): $350
- Parts: $200
- Total 10-Year TCO: $5,200 or $520/year, $43/month
Compare to hotel costs for camping trips without AC: 50 nights annually at $100/night = $5,000/year. Your air conditioner pays for itself in less than two weeks of camping annually.
Decision Criteria and Evaluation Matrix 📋
Use this framework to evaluate which coleman mach air conditioner model suits your needs:
Cooling Capacity Assessment:
- RV size: <25 ft = 13,500 BTU sufficient; 25-35 ft = 13,500-15,000 BTU; >35 ft = consider dual units
- Climate zones: Moderate = 13,500 BTU; Hot/Humid = 15,000 BTU minimum
- Usage patterns: Weekend = moderate capacity OK; Full-time = oversize slightly
Feature Prioritization: Rank importance (1-10) of these features for your situation:
- Maximum cooling capacity
- Low profile/aerodynamics
- Heat pump capability
- Energy efficiency
- Quiet operation
- Budget constraints
- Brand reputation/parts availability
Compatibility Check:
- Roof opening: verify 14″x14″ standard or note if custom sizing needed
- Electrical system: 30-amp or 50-amp service available?
- Weight capacity: roof structure adequate for unit weight?
- Ceiling height: low-profile needed for clearance issues?
Budget Planning:
- Purchase budget: $_____ (be realistic about what you can afford)
- Installation: DIY saves $300-600 but requires skills and time
- Supporting equipment: gaskets, sealant, tools if DIY ($50-150)
- Accessories: soft start kit ($200), smart thermostat ($300), etc.
- Emergency fund: set aside $500-1,000 for unexpected repairs
Financing and Payment Options 💳
Upfront Payment: Paying cash avoids interest charges and keeps total cost lowest. If you have funds available, this is optimal.
Credit Card Financing: Amazon and major retailers offer credit card promotions (0% APR for 6-12 months). This spreads cost without interest if paid within promotional period. Watch for deferred interest clauses—miss the payoff deadline and you owe interest retroactively.
RV Loan Refinancing: If you’re already paying off your RV, ask your lender about adding air conditioner costs to the loan. Interest rates are typically lower than credit cards (4-8% vs 15-25%), though you’ll pay interest over the full loan term.
Home Equity or Personal Loans: For major system upgrades including AC, solar, and batteries, personal loans or HELOCs provide affordable financing. Shop rates carefully—personal loan rates vary dramatically based on credit score.
Manufacturer Financing: Some retailers offer payment plans through third-party financing. Read terms carefully—these often carry high interest rates (18-30%) and aggressive collections practices.
Budget-Friendly Approach: Can’t afford the AC you want right now? Purchase a quality unit without premium features, install it yourself, and upgrade accessories (soft start, smart thermostat) later as budget allows. Coleman’s modular design supports this strategy.
Measuring Success Metrics and ROI 📈
Quantifiable Metrics:
Cooling Performance:
- Measure indoor temperature during hottest part of day
- Calculate temperature differential (outdoor minus indoor)
- Target: 20-25°F difference for properly functioning unit
- Monitor consistency—wild swings indicate problems
Energy Consumption:
- Track amp-hours consumed daily
- Compare against expected values (13,500 BTU ≈ 12-15 amps × hours run)
- Identify efficiency degradation over time
- Annual comparison reveals maintenance needs
Reliability:
- Count unplanned breakdowns
- Track hours between failures
- Document repair costs annually
- Compare against budgeted maintenance spending
Comfort Satisfaction:
- Subjective but important—are you comfortable?
- Can you sleep well in your RV year-round?
- Do guests find the temperature acceptable?
- Would you camp in different seasons comfortably?
Qualitative Metrics:
Quality of Life Impact:
- Extended camping season
- More enjoyable travel experiences
- Better sleep quality
- Improved health (heat stress prevention)
- Happier family/travel companions
Financial Benefits:
- Avoided hotel costs
- Extended RV usage
- Higher resale value (quality AC is selling point)
- Reduced depreciation from heat damage prevention
Peace of Mind:
- Confidence in reliability
- Reduced anxiety about extreme weather
- Ability to handle unexpected heat waves
- Backup options if needed (dual AC setup)
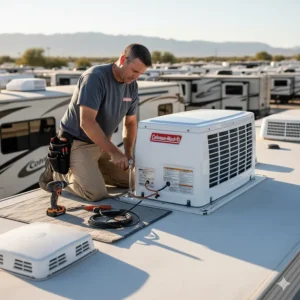
Frequently Asked Questions
❓ How long does a coleman mach rv air conditioner typically last?
❓ Can I run my rv air conditioner coleman mach on a 2000 watt generator?
❓ What's the difference between ducted and non-ducted coleman rv air conditioner systems?
❓ How much does professional coleman mach air conditioner installation cost?
❓ Do I need two air conditioners or will one coleman mach rv air conditioner suffice?
Recommended for You
- 10 Best 16 SEER Air Conditioner Units For Maximum Energy Savings in 2025
- 14 SEER Air Conditioner: 7 Top-Rated Models That Save You Money in 2025
- 7 Best 28000 BTU Air Conditioner Models for Ultimate Cooling Power in 2025
Disclaimer: This article contains affiliate links. If you purchase products through these links, we may earn a small commission at no additional cost to you.
✨ Found this helpful? Share it with your friends! 💬🤗